I'm excited to tell you that I've moved my blog over to a WordPress! Use the following link to access new posts and updates. Along with recipes and kitchen tips, I'll be posting about beauty and fashion, and whatever else I'm obsessed with at the moment. Enjoy :)
Sunday, February 23, 2014


Sunday, February 2, 2014
Mini Corn Dog Muffins

Let's just pretend
the Super Bowl didn't happen, shall we (we're a Bronco family... need I say
more)? To ease the pain of the so-called "game" that we watched
today, I made these adorable little corn dog mini muffins. Normally, I'd make
the corn bread mix myself but honestly, I was far too exhausted after our 3
hour hike so I will fully admit that I used the good 'ol boxed corn muffin mix
and some Hebrew National hotdogs. If you're going to go down that road and eat
hot dogs you might as well eat some that have the most "meat" in
them. I've provided you with a recipe that I've used before to make corn bread
so I know it'll be good. Hey! The NCAA season is fully underway so make these
for your next bball party and you'll DEFINITELY impress your guests! P.S., this recipe will make a LOT so if you're only baking for a few, cut it in half!
What you'll need:
3 cups
flour
1 cup
sugar
1 cup cornmeal
2 tbs.
baking powder
1 1/2
tsp. kosher salt
1 1/2
cups milk
1/2
pound unsalted butter, melted and cooled
2
extra-large eggs
1. Preheat your oven to 350*. Liberally grease a
mini muffin tin with non-stick spray.
2.
In a large bowl, mix
together the dry ingredients. In a separate bowl, mix together the wet
ingredients. Slowly add the wet ingredients to the dry and mix until there are
no lumps.
3.
Fill each muffin tin
about ¾ the way up. Cut the hotdogs into 6 pieces each. Place one hotdog in the
middle of each corn muffin.
4.
Bake for 15 minutes (or
until golden brown).
5. Let cool and serve with your favorite condiments.
Thursday, January 30, 2014
Super Bowl Snacks

By now, you're either finalizing where you'll be going to watch the Big Game or, if you're hosting, you're scrambling and realizing you're 3 days away and in desperate need of some each yet crowd-pleasing recipes. I've compiled a list of my top 10 favorite party foods for you. I know I've been on a health kick and trying to promote lower calorie eating but there are some events (this being one) that you can't skimp on the fried goodness. These recipes are all great for large crowds or just your few best buds. P.S. GO BRONCOS!
1. Chicken Parm Cupcakes
2. Oven Fried Chicken (wings for the game)
3. Vegan Buffalo Cauliflower Bites
4. Roasted Caprese Pops
5. Guac and Chips
6. Baked Chicken Taquitos
7. Turkey Sloppy Joe Sliders
8. Fried Artichoke Hearts
9. Cornmeal Onion Rings
10. Caesar Salad
11. Vegan Spinach Artichoke Dip (not pictured, but still a must!)
Wednesday, January 29, 2014
A Healthy Start
As you all know, I've been on a major health kick and diet for the past few months. As a result of some very hard work and dedication, I'm proud to say that I've lost about 50 lbs since September 1st. I feel great, I look great, and I can finally wear jeans without wanting to cry. Yes it was a huge physical change but it was equally a mental one. This was not a diet for me, but a lifestyle change.
A lot of people have been asking me what I did to drop the weight. I followed a variation of the HCG diet with a doctor (click the link and it'll take you to his page). The process was challenging at times but to see how far I've come and looking at pictures side by side I'd do it again 100 times if I knew how great I'd feel in the end. Now, it is very pricy. But I PROMISE you that it is worth it! If you just can't afford it right now (lets be honest, not many of us can) then follow this guide I've made for you below. THE MOST IMPORTANT THINGS are to drink enough water (you should be drinking 3-4 liters EVERY DAY), and to NEVER skip a meal!
I really hope this helps you all; it should give you a good jump start to get that body, AND MIND, you've always wanted.
Your breakfast should consist of 4-5 ounces EACH of protein and fruit.
Lunch should consist of 4-5 ounces EACH of protein, fruit, and vegetables.
Dinner should consist of NO MORE than 4 ounces EACH of protein and vegetables.
NOT counted in the 4 ounces is the unlimited foods. Those do NOT count in your meals. They're to be eaten freely to hold you over or as a filler at meal time. Don't go TOO overboard, though!
A lot of people have been asking me what I did to drop the weight. I followed a variation of the HCG diet with a doctor (click the link and it'll take you to his page). The process was challenging at times but to see how far I've come and looking at pictures side by side I'd do it again 100 times if I knew how great I'd feel in the end. Now, it is very pricy. But I PROMISE you that it is worth it! If you just can't afford it right now (lets be honest, not many of us can) then follow this guide I've made for you below. THE MOST IMPORTANT THINGS are to drink enough water (you should be drinking 3-4 liters EVERY DAY), and to NEVER skip a meal!
I really hope this helps you all; it should give you a good jump start to get that body, AND MIND, you've always wanted.
Your breakfast should consist of 4-5 ounces EACH of protein and fruit.
Lunch should consist of 4-5 ounces EACH of protein, fruit, and vegetables.
Dinner should consist of NO MORE than 4 ounces EACH of protein and vegetables.
NOT counted in the 4 ounces is the unlimited foods. Those do NOT count in your meals. They're to be eaten freely to hold you over or as a filler at meal time. Don't go TOO overboard, though!
YES
Lean protein
Fish (all)
Chicken
Turkey
Turkey bacon
Eggs
80/20 ground beef
Apples
Oranges
All berries
All vegetables
Coffee (TRY TO LIMIT TO 2 CUPS)
Non-fat Greek yogurt (limited)
Vegan aioli
Avocados (1/2 per day)
Hummus (try to limit amount to 2-3 tbs. And only if
served with veggies)
NO
Dairy
Butter
Fats
Oils (USE OLIVE OIL/CANOLA OIL SPRAY)
Bananas
Grapes
Pineapple
Carrots (if possible, none. LOTS of sugar)
Soda (unless diet)
Pasta
Bread
Croutons
Flour
Beans
Rice
Mayonnaise
Breadcrumbs (buy PLAIN melba toast and grind in a food
processor to make your own)
UNLIMITED
Cucumbers
Peppers (any/all kinds)
Tomatoes
Red onion/shallots
Lettuces
Cabbage
Garlic
Herbs
Salt/pepper/seasonings
Any ZERO calorie dressings (Walden farms)
Water
Sparkling/flavored water (as long as zero calories)
Tea
Sunday, January 26, 2014
Vegan Buffalo Cauliflower

What you'll need:
1 cup non-dairy creamer (or plain almond milk)
1 cup flour
2 tsp. garlic powder
1 head of cauliflower, chopped
1/2 cup buffalo sauce (or hot sauce)
1. Preheat the oven to 450*. In a large bowl, combine the flour, milk, and garlic powder. Coat the cauliflower and shake off excess.
2. Line a baking sheet with parchment paper (or spray with non-stick spray) and bake for 20 minutes.
3. Remove from oven and toss with the buffalo sauce. Bake for an additional 5-10 minutes. Serve immediately.
enjoy :)
Saturday, January 4, 2014
Cornmeal Onion Rings

I ran in to a small dilemma on New Year's Eve because one of my guests is gluten free. I had already made an amazingly garlic Caesar salad with croutons but I quickly realized he couldn't eat it because do the croutons. So I wanted to come up with something that wouldn't take too much attention away from my guests but would satisfy them all. Ok. Who DOESN'T like onion rings? That's right, nobody. These corneal fried onion rings are very quick to make and they're not covered in batter and "fry." They have a nice crunchy coating but you also taste the sweetness if the onions. I found the original recipe in one of Barefoot Contessa's cookbooks and tweaked it a tiny bit. They're great for a party or with a nice steak dinner.
What you'll need:
2 large sweet onions, cut into 1/2 inch rings
2 cups buttermilk
- 1 tsp. kosher salt
- 1/2 tsp. pepper
- 1 cup all-purpose flour
- 1/2 cup yellow cornmeal
- 1 quart vegetable oil
1. In a LARGE, deep pan, heat the oil for a few minutes until it starts to ripple.
2. Coat the sliced onions with the butter milk, salt, and pepper. Let sit for at least 30 minutes before cooking.
3. In a deep plate, mix together the flour and corn meal. Shake off the excess butter milk and dip the onions in the flour mixture.
4Drop into the hot oil and fry for about 2 minutes then flip over. Remove to a baking sheet lines with paper towels to from the excess oil. Serve warm (If you have time between cooking and serving, keep them in a 200* oven to stay warm).
enjoy :)
Wednesday, January 1, 2014
Happy New Year

Happy New Year to all of you. My resolutions this year are to 1. Keep up with my new healthy lifestyle (let's not mention the cornmeal onion rings and buttery steak I ate last night... Recipe to follow), and 2. To post lots of healthy recipes from my diet, and more often, this year.
Relax, enjoy, watch the parade and some football today. You deserve it!!!
Carlye
Monday, December 30, 2013
Rosemary Cashews

What you'll need:
1 lb toasted, salted cashews
2 tbs. fresh rosemary, minced
1 tbs. kosher salt
1/2 tsp stevia
2 tbs. melted butter
1. Preheat your oven to 325*. Toast your cashews for 10 minutes, just enough to warm them.
2. Mix revert thing else in a bowl. When cashews are warmed through, toss everything together. Let cool and serve!
enjoy :)
Tuesday, December 17, 2013
Garlic Kale Chips
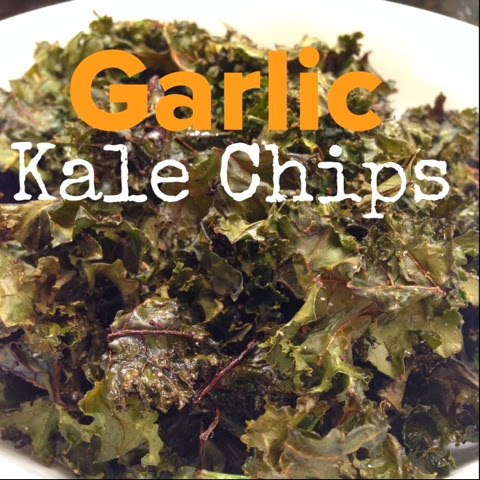
What you'll need:
1 10oz bag chopped kale
Canola oil spray
1/2 tsp. garlic salt
1. Preheat your oven to 400*. Lay 1/4 of the kale on a baking sheet in a single layer. Spray with a few spritz of the canola oil and sprinkle a tiny bit of the garlic salt (the pan looks crowded but they will shrink). Bake for 20 minutes.
2. Repeat the process until you've used up all of the kale chips (about 4 more times).
enjoy :)
Tuesday, December 10, 2013
Holiday Gift Guide 2013
We've decided to push back our Hanukkah gift exchange until my sister comes back for Christmas. With just two weeks left, I have been struggling to find the perfect holiday gift for the foodies in my life. I've compiled my Top 10 list of foodie Must Haves for those that are in the same boat as I am (and who's bank account is struggling, too). All of the gifts are under $100 to save everyone's sanity a little bit. Oh, and almost all of the websites are offering FREE SHIPPING for guaranteed Christmas delivery!

1. A great set of whisky stones to keep your drink chilled and not watered down.
2. Blank gift tags to add a personalized touch to gifts.
3. Stainless wine opener and foil cutter.
4. Le Creuset signature round Dutch Oven, a necessity for all cooks.
5. Wood Monogram cheese board.
6. Cheery wood Boos cutting board.
7. "From the Kitchen of" Stamp from Yellow Owl Workshop.
8. ADORABLE Mason Jar shot glasses.
9. The Bible of cook books, Mastering the Art of French Cooking by Julia Child.
10. Reusable striped popcorn cups.
Monday, December 2, 2013
Gruyere and Prosciutto in Puff Pastry

Call me crazy but I'm already planning my New Year's Eve plans. I know, I know, we JUST had Thanksgiving but you know how I am. I was thinking about what I wanted to serve for appetizers (I'm not huge into going out; I'd rather open a great bottle of wine and feast until I can't move) so I began sifting through my cookbooks. I came across this little doozy from my lovely Barefoot Contessa. Her recipe called for ham rather than prosciutto and dijon mustard but Daniel LOVES prosciutto and hates mustard (I know, he's odd). This is a no-stress, simple appetizer that you can throw together in just minutes but will taste, and smell, like you've been slaving over it for hours! Oh, and did I mention the melty, gooey cheese?!
What you'll need:
2 sheets puff pastry, defrosted in the fridge overnight
5 slices prosciutto
8 oz. shredded gruyere
2 tbs. garlic aioli
1 egg, beaten with 1 tbs. water (for egg wash)
1. Preheat
the oven to 425* and line a baking sheet with parchment paper.
2. Lay 1
sheet of puff pastry on a floured surface and carefully roll it out to 10x10”
square (just eyeball it if you don’t have a ruler handy). Transfer it to the
baking shet and spread the aioli over it, leaving a ½ inch border. Begin
layering the prosciutto down and top with mass amounts of gruyere.
3. Place
the second sheet of puff pastry on the floured surface and roll it out to 10x10”
square. Place it on top of the other pastry sheet, push down the sides and
brush the top with the egg wash.
4. Cut 4
diagonal slits across the middle (this will allow steam to come out, or else it’ll
explode).
5. Bake for
20 minutes, until puffed and golden brown. Let cool and serve.
enjoy :)
Sunday, December 1, 2013
Horseradish and Chive Mashed Potatoes

Probably
the most important entity of your Thanksgiving, Hanukkah, and/or Christmas
dinner is the mashed potatoes. There is about 10,000,000 ways to make them and
I usually stick to roasted garlic and non-fat Greek yogurt but this
Thanksgiving we celebrated the once in a lifetime event of Thanksgivukkah. To
marry the flavors of Hanukkah and Thanksgiving I made horseradish and chive
mashed potatoes. I'm not a fan of horseradish at all but apparently they were
received by rave reviews! Of course the original recipe came from Buzzfeed and their incredible
Thanksgivukkah menu, but I used a little less horseradish because I didn't want
to offend anyone's taste buds. If you want to try something different with
your side dishes then this is sure to please those with pallets that are up to
experimentation!
What
you'll need:
1
whole head of garlic, roasted
3 pounds Russet or Yukon Gold potatoes
2 tbs. horseradish
1 cup non-dairy creamer
3 tsp. kosher salt
1 tsp. pepper
1 large bunch chives
1. Roast your garlic at 400* for 45 minutes.
2. Peel and boil your potatoes (remember, ALWAYS boil potatoes
in cold water. This will take anywhere from 25-35 minutes). Drain and use a
hand mixer to mash your potatoes.
3. Slowly add the creamer salt, pepper, and garlic. Continue to
mix until thoroughly combined. Chop and add ¾ of the chives and horseradish.
4. Garnish with the remainder of the chives and serve
immediately.
enjoy :)
Happy Thanksgiving


Happy Thanksgiving everyone. I hope you got to spend it with those most special to you; I know I did!


Saturday, November 23, 2013
Pumpkin Pie Granola

It's now that day after Thanksgiving and the last thing you want to do is cook a full meal for your out of town guests. But guess what? You don't have to! Not only will nobody have room left in their stomachs for a big breakfast, but they're not going to expect you to put on a whole other production (they shoulnd't at least). But, if you REALLY want to surprise them, make a pumpkin pie granola! It is SO easy and you'll definitely have some left over pumpkin from the pies you were planning on making but gave up on (its ok, it happens to the best of us). I found the original recipe from Dashing Dish and it was a total hit with the kids at school (9 times out of 10 they're my guinea pigs).
What you'll need:
4
cups
|
Old
fashioned rolled oats
|
|
2
tsp
|
Ground
cinnamon
|
|
2
tsp
|
Pumpkin
pie spice
|
|
1/2
cup
|
stevia
or other sugar replacement
|
|
1/2
tsp
|
Salt
kosher
|
|
1
tsp
|
Baking
powder
|
|
3/4
cups
|
Pumpkin
|
|
1/2
cup
|
Applesauce
(unsweetened)
|
|
3
tbs
|
agave
nectar
|
|
1/2
cup
|
white
chocolate chips
|
1. Preheat your oven to 325*. Line 2 baking sheets with parchment paper and spray with non-stick cooking spray.
2. Mix together the dry ingredients in one bowl and the wet ingredients in another (NOT the chocolate chips). Mix together and spread in a single layer on the sheets.
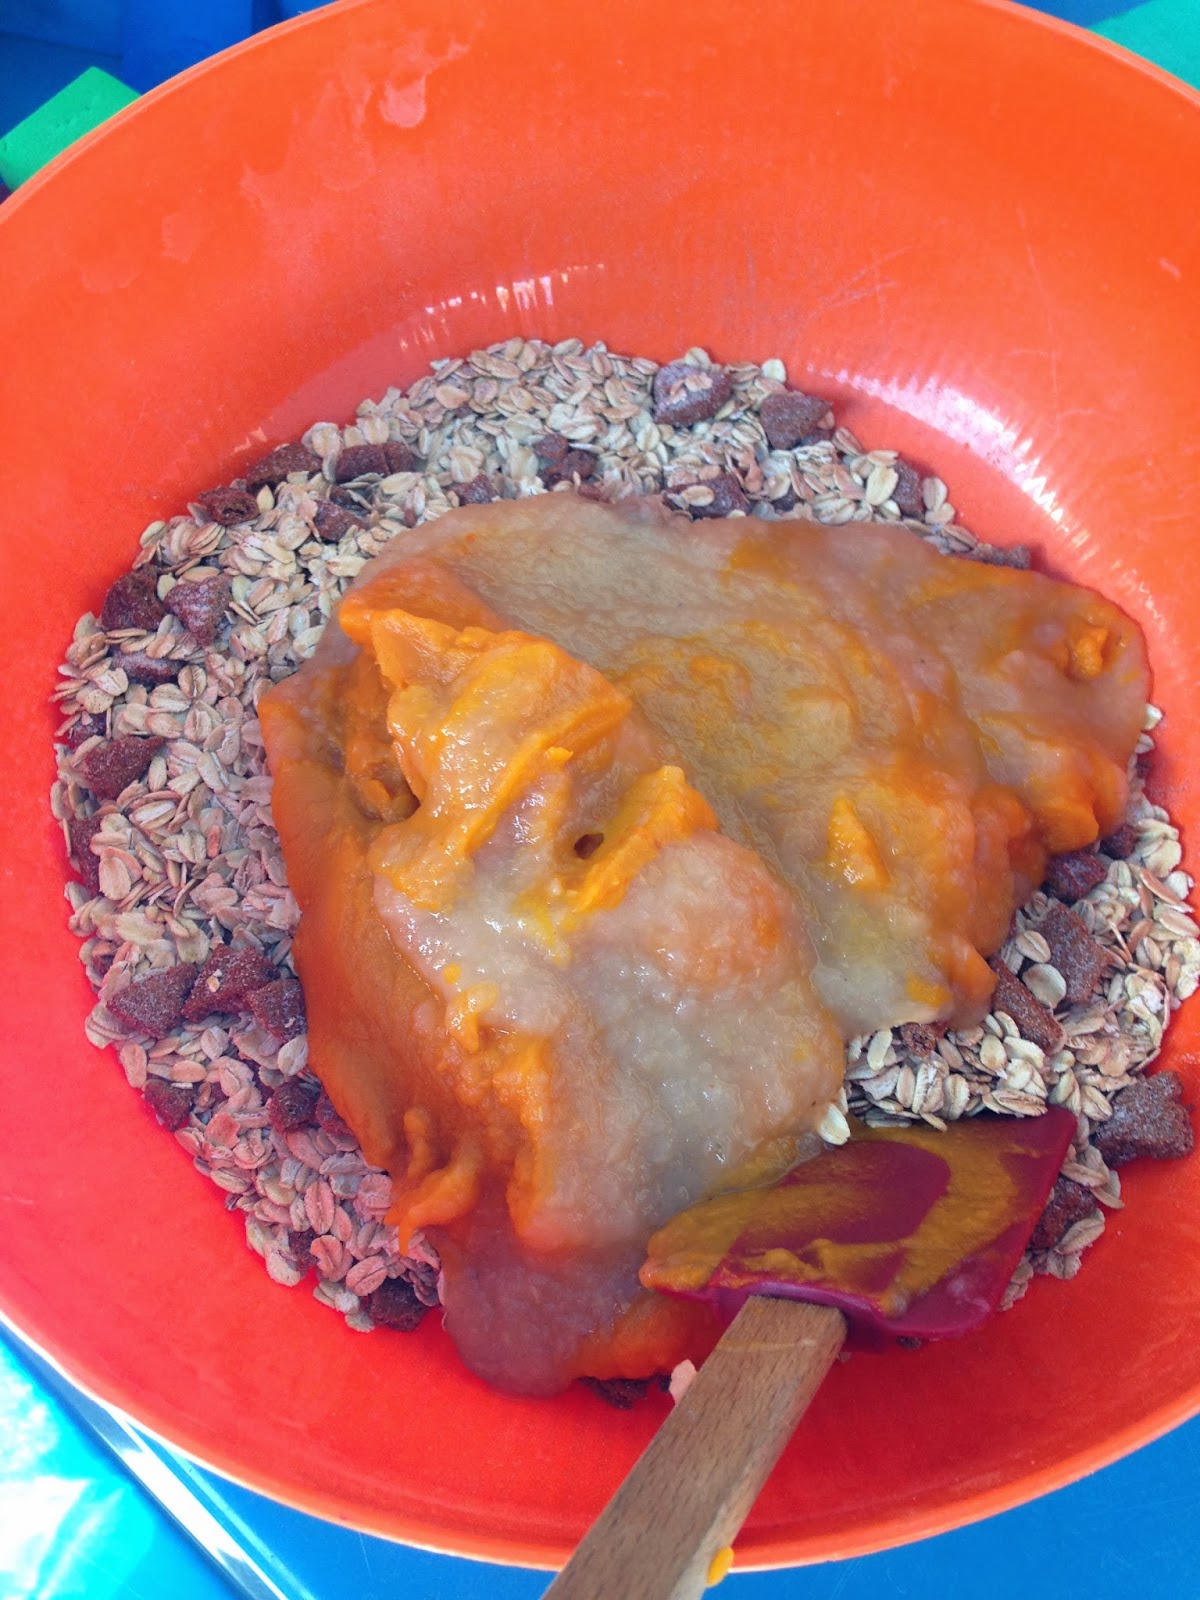


enjoy :)
Sunday, November 17, 2013
Cranberry Apple Sauce

Now, if you want to do this in a pot on the stove because you're impatient like the most of the of, then follow these steps: Add all ingredients MINUS the apples to a small pot. Bring to a boil and reduce heat to low and cook for 20 minutes. Add the apples, cover, and cook for another 20 minutes.
I don't know about you, but I can't wait for Thanksgiving, it's absolutely my FAVORITE holiday!!! That's one thing crossed off my list (I'll actually be able to watch the parade this year!), and it's now in the freezer getting ready for the big day!
What you'll need:
1 12 oz. bags fresh cranberries
8 gala apples (if they're big, maybe 6)
2 tbs. cinnamon
1 tsp. kosher salt
1/4 cup sugar
1 tbs. lemon juice
Zest of two oranges
1/4 cup orange juice (about 1 orange)
1. Rinse your cranberries in cold water, dry, and plop into your slow cooker. Peel, core, quarter, and slice your apples into big chunks and add to the slow cooker.
2. In a small bowl, mix together the cinnamon, sugar, lemon juice, orange juice, and orange zest. Pour it over the apples and cranberries, sprinkle with salt, and let it cook for 8 hours.
3. Stir every 2 hours to break up the apples (after the 6th hour, the apples will start breaking down). Turn off after 8 hours and let it sit for another hour or so to thicken up. Let cool and serve or pack up and freeze!
enjoy :)
Monday, November 11, 2013
Pumpkin Spice Challah

There is this undeniable falvor and texture that you can only find in challah bread. Sure chcolate chip challah, raisin challah, plain challah are all delicious but how many times can you have a roasted chicken on a Friday night? With the fall holidays upon us, I wanted to take on a new twist to the usual challah bread we eat every Friday. This time, I had to dive into pumpkin challah (I'm a little obsessed with everything pumpkin these days), and I am here to tell you that the kids at school LOVED it (remember, we cook every Thursday with them). I did try to make this a few weeks ago with whole wheat flour and let me tell you this: IT DID NOT WORK!!!!! So please, don't do it! Anyways, I think I may use this challah recipe to make the challah for stuffing for Thanksgiving. Don't worry, I'll give it a test drive and let you know how it turns out! Oh, by the way, this recipe is a step-by-step way to make challah by hand. If you want to use a stand mixer you certainly may. Everywhere I say to do something "by hand," change it to "using a dough hook."Now, this is quite time consuming, so I suggest you do it the night before you wish to serve or the night of ONLY if you have about 3-4 hours to bake.
What you'll need (will make TWO loafs or about 30 cupcakes):
2 packages active dry
yeast
1 cup water
3 tbsp granulated sugar
1 whole egg
6 egg yolks
1/4 cup honey (do NOT use agave, not the right sweetness)
2 tbs. canola oil
2 tsp. kosher salt
3 tbs. Pumpkin Pie Spice
1/2 cup brown sugar,
packed
2 cups pumpkin puree
(this is equal to one whole can)
7-9 cups all-purpose
baking flour
2. Preheat your oven to 350*. In a large bowl, add the yeast, 1/2 cup water, and 1 tbs. of the sugar and mix by hand. Let the mixture sit for about 10 minutes to dissolve and become foamy (the foam should be quite thick. If this does not happen, then your yeast has probably gone bad!).
2. Once your yeast has activated (gets foamy), then add the the rest of the granulated sugar, egg, egg yolks, honey, canola oil, salt and spices. Use a whisk to throughly combine the ingredients.
3. Mix in the brown sugar and the pumpkin puree until the mixture is nice and smooth. Ok here comes the messy part: start adding in the flour, 1 cup at a time, using a whisk (or your hands) to form a dough. Keep adding until the dough is smooth and not sticky anymore. Knead for about 7-8 minutes.
4. Pour a few tbs. of canola oil into a large bowl and smear it all over. Plop your dough in the bowl, rubbing the oil all over the dough. Cover your dough with a CLEAN kitchen towel and place on your stove on TOP of your oven. ***(if your oven is not connected to your stove then preheat your oven to 200*, turn off, and let your dough rise in the oven while it is OFF)*** Let rise for 1 hour.

5. Take the dough out, punch it down a few times, then divide into cupcakes and cover to rise for another hour OR, if you're making a braided challah, put back in the bowl, cover, and let rise for another hour.


8. Bake in a 350* oven for 20 minutes, turn the pan (the back of the oven is the hottest so you want to make sure both ends of the pan bake evenly) and bake for another 20 minutes.
9. Let cool and chow down!!!


Tuesday, November 5, 2013
Tips in the Kitchen- DIY Silver Jewelry Cleaning

What you'll need:
1 tbs. kosher salt
1 tbs. baking soda
2 cups near boiling water
1 baking dish
Aluminum foil.
1. Line your baking dish with a single layer of foil. Pour baking soda and salt in the middle.
2. Drop in your jewelry and pour the water over it. Watch it sizzle and wait 5 minutes.


Saturday, November 2, 2013
Balsamic Steak Rolls

I came across this amazing recipe on, of course, Pinterest and I've been dying to make it for weeks. I have been on my very strict diet and most of the recipes I find on Pinterest are outside of the jurisdictions of my regime. But I was pleasantly surprised to find that this fit right in! I used flank steak, which doesn't have too much fat, and a ton of veggies to stuff inside. It's very cute and I think you just might be able to get your kids to eat it! If not, then there is more for you! Like I said, I lightened up the sauce and the veggies for my version but the original version looks just as great to me (but it has butter, brown sugar, and olive oil, all of which I am not eating). Either way, this will be a FABULOUS meal that looks complex but is SO easy! OH!!! Don't forget tooth picks!
What you'll need:
For the steak
2 lbs. flank steak
1 tsp. kosher salt
1/2 tsp. pepper
3 tbs. Worcestershire sauce
1 tbs. steak seasoning
For the veggies
1 carrot (I bought shredded and it worked perfectly)
1 zucchini
1 bell pepper (any color is fine)
6 green onions
1/2 red onion
1 tsp. herbs de Provence
For the Sauce
Olive oil spray
2 tbs. finely minced shallots
1/2 cup balsamic vinegar
2 tbs. Stevia (or any zero calorie sweetener)
1. Prep your steak. Cut in to 8-10 slices, about 6 inches long. Salt and pepper both sides of the steak, then toss in a large zip lock bag with the Worcestershire sauce. Give it a good shake and let it sit in the fridge for an hour or so.
2. After an hour, take the meat out of the fridge so it can come to room temperature (it cooks more evenly when it is at room temperature).
3. OK...Veggie time. Slice all of your veggies into match-stick sizes (I don't have a fancy machine to do it for me so I just went for it by hand), including the green onions.

4. In a medium pan heated to medium heat, spray cooking spray and sauté the shallots. Add the balsamic, Stevia, and beef broth. Let simmer for about 10 minutes, then turn off heat to let it thicken (Don't worry, IT WILL!!!).
5. While the sauce is cooking, quickly stir fry the veggies in some cooking spray and whole garlic cloves (this just infuses the flavor f the veggies with garlic, but does not overwhelm). You do NOT want to cook them too much (they'll continue to cook inside of the steak when they're on the grill), so no more than 3 minutes.
6. Heat your grill pan time! Now, place a few pieces of each veggie inside of the steak so they're sticking out on the sides. Roll up and secure with a few toothpicks. Sprinkle with steak seasoning all over and start grilling toothpick side down.

7. Grill for about 3-5 minutes per side and serve immediately with balsamic glaze!
 |
| Daniel wanted yo to see how perfectly it looked inside |
enjoy :)
Chocolate Chip Waffles

After a long week of work and school, some Sunday mornings just call for homemade waffles, no matter what. But to make them extra special, you just have to add some chocolate chips! You really have no excuse NOT to. They're really quite simple to make and if you've baked just about anything in the last 6 months, you should have all of the ingredients in your pantry. I made these a little bit on the healthy side, opting for vegan butter and non-dairy creamer and they were just as fluffy as you could ask them to be!
What you'll need:
1 1/4 cup all-purpose flour
1/4 tsp. baking soda
1/2 tsp. baking powder
1/2 tsp. salt
2 tbs. sugar
2 whole eggs, beaten
2 tbs. vegan butter, melted
1 cup milk (I usually use non-dairy creamer)
1/4 cup chocolate chips
1. Heat your waffle iron by following the instructions it provides. Mix all dry ingredients in a large bowl, and all wet ingredients in a big giant measuring up (makes it very easy to pour).
2. In a separate bowl, alternate between mixing the wet and dry ingredients until well incorporated. Finally, add in the chocolate chips and pour on your waffle maker.
3. Cook until golden on both sides and serve with some warm syrup!
enjoy :)
Wednesday, October 16, 2013
Slow Cooker Pumpkin Butter

What you'll need:
2 cans organic pumpkin
4 tbs. pumpkin pie spice
1 tbs. kosher salt
Juice of 1 lemon
3/4 cup sugar
1/4 cup brown sugar
1/4 cup honey
1. Put everything in a crock pot. Cook on low for 8 hours.
2. After 8 hours, turn crock pot off and remove the top half way (to let the steam out and let it thicken). Let sit for an hour.
enjoy :)
Subscribe to:
Posts (Atom)