Search

Monday, April 30, 2012

Onion Rings


Today is Monday. This can only mean one thing: last night was Sunday night! Remember, friends, on Sunday nights we eat junk food and watch silly TV. We were having a hankering for burgers so El quicky grilled up some delicious sliders (mini burgers on mini buns!) but we were stuck on the side dish. About a year ago my mom bought these amazing french fry cones. Slip in some wax paper and they look totally restaurant professional! 9 times out of 10 we go with fries of some sort but we really didn't want that tonight but we still wanted to use the cones. Next idea? Onion rings! Beer battered onion rings. Yes, it's ok for your tummy to grumble right now, mine is too!!!

What you'll need:
2 medium onions
2 tsp. baking powder
1 1/3 cup unbleached white flour
1 tsp. kosher salt.
1/4 tsp. pepper
1/2 tsp. spicy plank rub (any smoky rub will do)
1 can (or bottle) of a good COLD beer (we used Tecate light)
3 cups oil for frying (grape seed or Safflower works best here)
Wok

1. Heat your oil (not TOO hot, or else the onion rings will burn).
2. Slice your onions so they're about 1/2 inch thick. Separate them so there is 1-2 pieces of onion per ring (1 isn't enough to hold the batter).

3. In a large bowl, mix together the flour, salt, pepper, rub, and beer. Whisk together and let the flavors come together.

4. In a shallow plate, place the baking powder and dredge the onions there before placing into the batter.

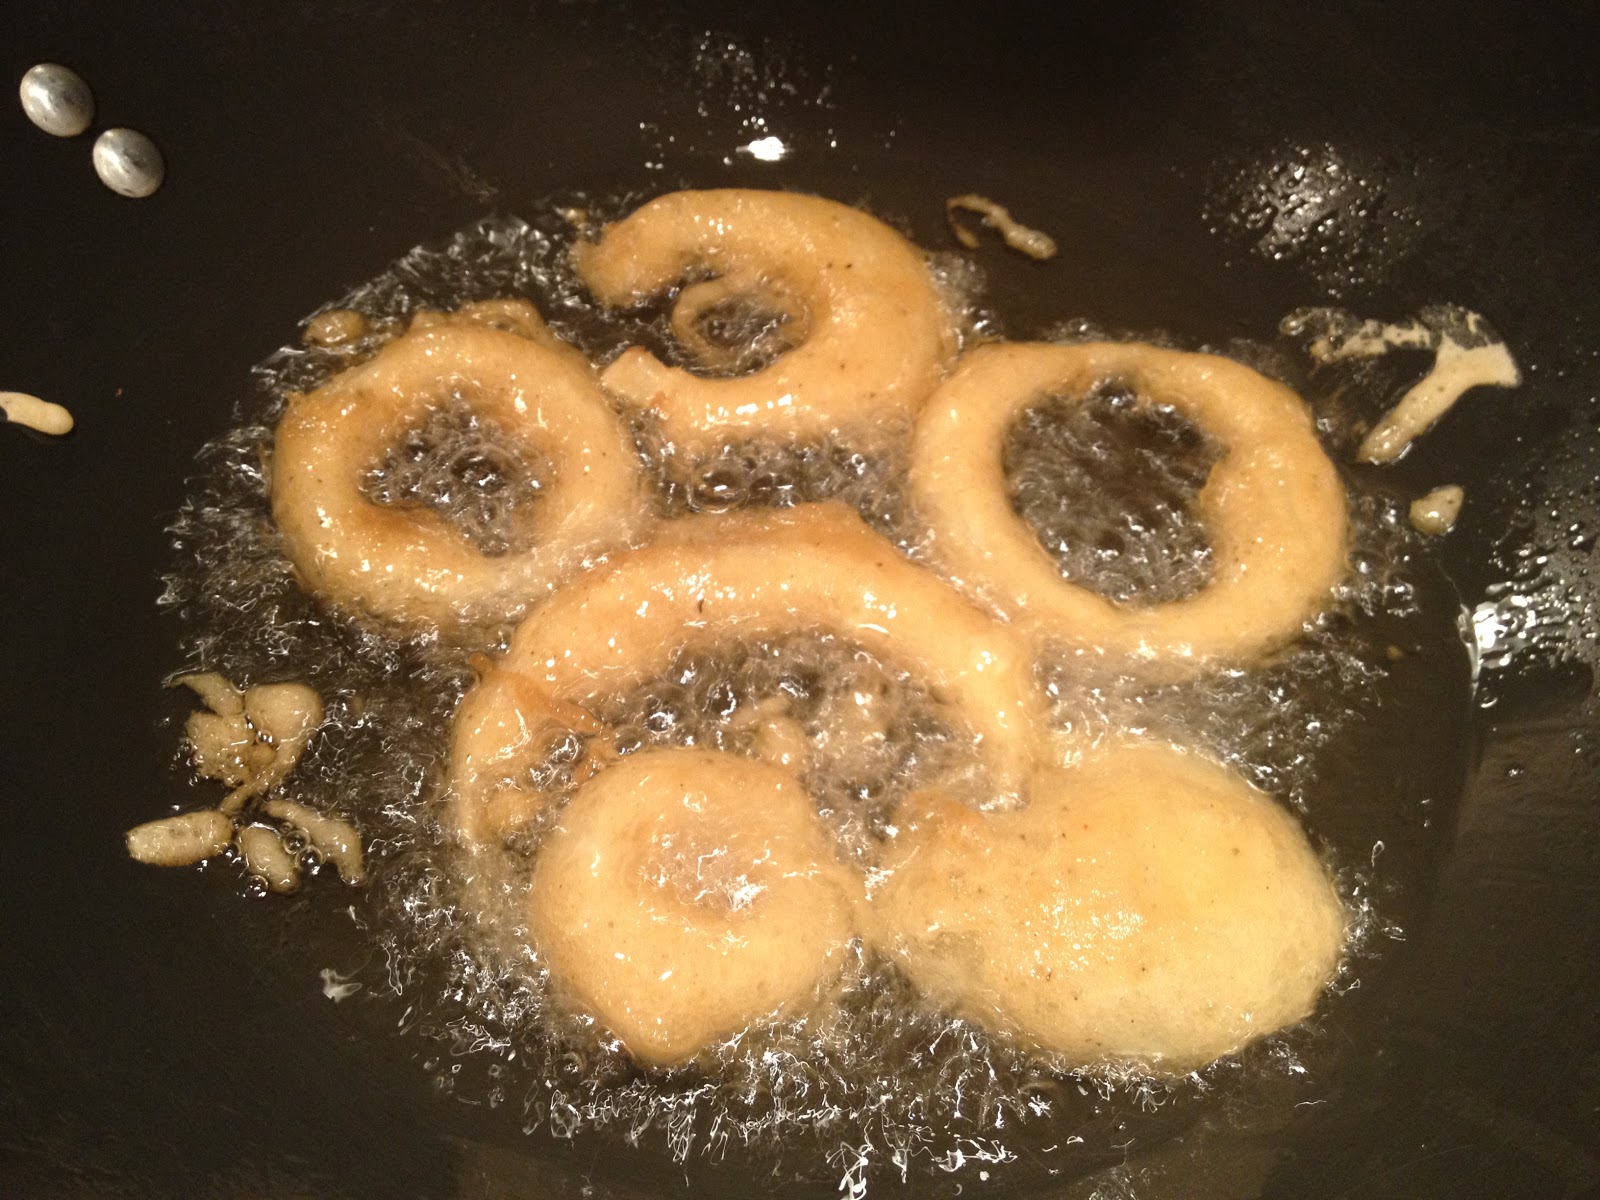
5. After the onions are dredged, place in the batter bowl, then into the hot oil.

***ONLY PUT ABOUT 3-4 ONION RINGS IN THE OIL AT ONE TIME. ANY MORE THAN THAT WILL BRING DOWN THE TEMPERATURE OF THE OIL AND THEY WON'T COOK ALL THE WAY THROUGH AND WILL BE SOGGY :(***
6. Let onions cook for about 1 minute per side (or until they're golden brown), let excess oil drip off onions, and lay on a cookie sheet lined with paper towels (to soak up the leftover grease).

7. Serve with your favorite condiments!


enjoy :)

Friday, April 27, 2012

Portobello Mushroom Pizza

So I decided to give up carbs. I've been doing pretty well for about 2 weeks when all of a sudden, I hit a wall last night. PIZZA kept coming to mind and I just couldn't stop thinking about it. Just when I was about to give in I looked in the fridge and saw a few beautiful Portobello mushrooms. BOOM! Portobello mushroom pizza!!! Loaded with vitamins and protein, it was the PERFECT substitute! Break off the stems, sauté some veggies, top with cheese, and you're good to go!!! OH!!! And want to know what made it even BETTER?! Olive oil with white truffles! Yup, you read correctly! Oh, and use some daiya and it's a vegan pizza!

What you'll need:
4 portobello mushrooms
1 yellow and one green zucchini
5 roma tomatoes
1 large onion
6 cloves of garlic
2 tbs. white truffle olive oil
Kosher salt & pepper
1/4 cup mozzarella cheese (or daiya)
2 tbs. grated parmesan cheese

1. Preheat your oven to 450*. Chop your onion and sauté until browned.
2. While onions are cooking, chop the zucchini into bite size pieces. Once onions are browned, add zucchini, salt and pepper (about 1/2 tbs. each).
3. When zucchini start to soften, add chopped tomatoes (cut them in half and pull out seeds).
4. Take a garlic press and press the garlic. Mix through and let cook for less than a minute, so it keeps its strong flavor yet isn't bitter anymore.
5. Take about 2 large spoonfulls of the veggie mix and plop it in the middle of each mushroom (stem side).
6. Line on a baking sheet (spray with cooking spray, please! Or they'll stick) and top with mozzarella and parmesan. Bake for 15 minutes and serve immediately!
 
enjoy :)
Vegan Portobello Mushroom Pizza

Wednesday, April 18, 2012

Turkey Taco Lettuce Wraps


Have I ever told you guys how much I LOVEEEEEEE Mexican food?! Ugh, if it was socially acceptable, I'd have my favorite restaurant cater my imaginary wedding and have it delivered to my couch every single day! With that said, it's been equally as difficult coming up with new ideas for dinner and, since last night was Tuesday night, only one thing was appropriate for dinner: Tacos! It's Taco Tuesday, people!!! I found a great recipe while on PInterest for skinny tacos and, with my own little twist, I made them for dinner and there were two VERY empty plates! These are great as regular tacos or as lettuce wrap tacos (as I had them!). They're super simple, so they're absolutely perfect for a weeknight when you have no real desire to cook something which requires lots of energy, yet has LOTS of flavor! OH!!! And DEFINITELY serve with some guacamole and cheese to make them PERFECT!!!

What you'll need:
1 lb. ground turkey (99% lean)
1 onion, minced
1 green bell pepper, chopped
2 tbs. taco seasoning (or any variation that's similar)
3/4 cup water
1/2- 3/4 cup salsa
Large iceberg lettuce leaves (as a sub for tortillas)

1. Brown your turkey. WHile cooking, cut your bell peppers and onions into small, bite size pieces.

2. Once turkey is cooked, add the taco seasoning. Mix well.
3. Add the onion, bell pepper, water, and salsa and let simmer on low for 20 minutes.

4. As turkey concoction is cooking, cut the lettuce leaves so they're manageable (some of them can be ridiculously too large!).
5. Prepare your toppings (sour cream, shredded Mexican blend cheese, guacamole, yadda yadda yadda).
6. Serve immediately!

enjoy :)

Wednesday, April 11, 2012

Seared Ahi Salad

While in Tucson this past weekend, I revisited one of my favorite restaurants, RA (sushi!). I've been trying to be a good girl and not eat too many carbs (except for the Las Vegas Roll there which is basically just a party in your mouth) so I ordered this incredible seared ahi salad. I've been craving it ever since and have been dying to make it. After hunting down what felt like the last pieces of ahi in LA, I made it for El and I tonight. Pretty much all I can say is "go me!!!" If I could eat this salad every single day and not have to worry about mercury poisoning or OD'ing on fried wontons, I'd do it!!! I created my own dressing with minced shallots, ponzu, and a light sesame dressing (P.S. I have extra sitting over night for my salad for lunch tomorrow hehehe) and added chopped roasted peanuts on top to give it that extra crunch. I wish I had a picture of the "after" to prove to you how great this was!!!
And have I mentioned how AMAZING the fish is at Costco?! Seriously, it's delicious, fresh, and CHEAP (well cheaper than going out for this same salad every night!)!
P.S. This is a VERY fast paced meal so make sure everything is ready to go right away!!!

What you'll need (this will make A LOT so you can have it for lunch the next day!!!):
2 tuna steaks
they look like this
Salt & pepper (eh, about 1/8 tsp. each)
Olive oil (just enough to coat the bottom of the pan)
Mixed baby greens
Fried wonton chips (just buy them at Gelson's or Trader Joe's or whatever specialty market you have near you!)
1/4 cup chopped roasted peanuts (or cashews)
1/4 cup light sesame dressing
this one is PERFECT!!!
1/8 cup ponzu sauce
1 shallot, minced
2 avocados, sliced

1. Turn the burner on high and start heating your pan (you want it HOT HOT HOT!!!).
2.  Mince the shallot and, in a bowl, mix together the ponzu and sesame dressing (I found a great one at Gelson's). Add the shallot and let sit for a few minutes.
 
4. In a large salad bowl, add your lettuce and wonton chips.
5. Chop your peanuts so they're cut into thirds and add them to the lettuce and wontons.
6. Season both sides of the tuna steaks with salt and pepper. After you've let your pan heat on high for AT LEAST 5 minutes, put oil in the pan and let the tuna sear on both sides for about 1 minute (until it gets a nice crust on top but still raw in the middle).
7. Meanwhile, as the tuna is cooking, toss the salad. Slice the avocados at this time, too.
8. Remove from the heat and slice immediately (don't let it sit and cook any longer or it'll dry out!).
9. Place the lettuce on your plate and alternate between one slice of avocado and one slice of tuna. Top with a tiny drizzle of ponzu and chopped peanuts and you're good to go!!!

enjoy :)

Roasted Garlic Potatoes


A few posts ago, I taught you the way I like to roast garlic. While there are many techniques, I love mine :). In that post, I offered you some great food options that would pair up with the garlic beautifully. One of those options is potatoes. I love pretty much every single form of a potatoes; fried, baked, roasted, it's all good to me!!! When I roast them, I almost always stick to just rosemary. But for Passover this year, I wanted to jazz it up. I know, I know. I always tell you guys to NEVER try new recipes on big holidays but I sorta knew this would be delish :). I believe, just like with garlic, there is never enough rosemary. Please don't waste your money on buying it. Go outside and you'll find some growing somewhere. Cut a whole bunch and leave it in a glass of water so it stays fresh. Roasted garlic rosemary potatoes is an absolutely beautiful (both visually and foodily. And yes, that's a word) side dish to try with fish, chicken, or any other form of protein!

NOTE: There are no specific measurements for this meal. Go based on how many people you will be feeding. Each person will usually have about 1/4-1/2 cup (once they're cut in half).

What you'll need:
Fingerling potatoes (if they're big, cut them in half)
2-3 tbs. FRESH rosemary
Roasted garlic
1/2 tbs. Salt & pepper
2-3 tbs. Olive oil

1. Preheat your oven to 375* (the universal temperature. If you're ever not sure what to bake something at, go with 375*).
2. Cut your rosemary and chop as finely as you can get it (yes, it tastes great, but chunks of it aren't too appealing to everyone).
My Grandma. Isn't she FABULOUS?!
2. Rinse and cut your potatoes in half (if they're still too big, cut in thirds).
3. Toss with olive oil, salt, and pepper. Add the chopped rosemary and toss again.
4. Bake in the oven for about 20 minutes (check to make sure they're not burning (no need to grease your pan, there's enough olive oil on the potatoes to keep them from sticking).
5. Remove from the oven and IMMEDIATELY toss in the roasted garlic (the heat from the potatoes will bring out the amazing flavor and scent of the garlic!)
6. Top with a little more rosemary and serve!

enjoy :)

Sunday, April 8, 2012

Balsamic Roasted Asparagus

I have ALWAYS loved asparagus. But, I have usually cooked it one way. Olive oil, slat and epper and there you go. It's always delviious but I was a bit sick of it. I know I have told you all to NEVER try out a new recipe on big holidays or events, and Passover is NO exception (do you really want angry, hungry Jewish people yelling at you!? That's what I thought). BUT, I broke one of my own rules this weekend and decided to jazz up the roasted asparagus with a nice drizzle of balsamic vinegar. Along with garlic and lemon, I feel like there is NEVER enough balsamic vinegar. Next time you're sick of the way you prepare your veggies, or if you've never cooked them before, roasting them with balsamic is absolutely delicious! The balsamic caramelizes and becomes sweet and creates a PERFECT crunch and glaze on top of any vegetable!!! Please try, you'll be glad you did! I promise :)

What you'll need:
1 lb. asparagus
Olive oil
Salt
Pepper
2 tbs. balsamic vinegar

1. Preheat your oven to 375*.
2. Grab one of your sprigs of asparagus by the head and by the bottom and bend in a downward motion. Wherever the asparagus breaks, that's where you're going to trim all of the sprigs (this is the ripe part and will get rid of the icky part).
3. Rinse and dry your asparagus then lay on a baking sheet (no need to spray with cooking spray!).
4. Drizzle about 2-4 tbs. olive oil all over the asparagus, followed by the salt and pepper.
5. With CLEAN hands, toss them around and make sure each sprig is fully coated and seasoned.
6. Finally, drizzle the balsamic acorss the asparagus.
7. Bake for about 10 minutes (check by poking the thickest part of the bottom of the asparagus. If it feels tender, they're finished!!!) and remove.
8. Serve IMMEDIATELY!!!

enjoy :)

Roasted Garlic

One of the reasons that I wanted to start my blog was to share my cooking "secrets" and skills with everyone. Some of these skills are more attainable than others. And that made me realize that I need to share some super basic things that will only make things more delicious. With that said, I am now going to teach you how to roast garlic!
In my personal opinion, there is NEVER enough garlic or enough lemon in anything (vampires hate me!). I actually had a waiter ask me yesterday if I wanted some water to go with my lemons. Anywho, this weekend for Passover, I made some great oven roasted potatoes (which I will share with you in my next post) with roasted garlic. I've told you all how to quickly roast garlic before or have mentioned it in at least 15 different recipes, but here is EXACTLY how I like to slow roast it (its soooooooooooooooooooo much better than the store bought kind!!!). Sometime using garlic can be scary because if you don't cook it enough, the taste will and smell will stay in your mouth for days and nobody will want to talk to you, and if you cook it too much, it burns and tastes like coal. But roasting it brings out the sweetness (oh, yes, garlic can be sweet!) and tones down the harshness that raw garlic exudes. It's simple and it will make your kitchen smell like you've been cooking for days. It's a simple touch to any dish that will be sure to impress your guests. 

What you'll need:
1 head of garlic
A VERY sharp knife
1 oven safe shallow dish
Olive oil.

1. Preheat your oven to 350*.
2. Cut your garlic in half, horizontally. Do NOT peel any of the skin off (It keeps the cloves from falling out).
3. Place each half of the garlic head, cut side up, on the oven safe baking dish (if you don't have one, you can definitely use a baking sheet, pie plate, or a bowl made out of a few pieces of tin foil folded together).
4. Drizzle with some olive oil (so it stays moist in the oven and doesn't dry out and burn.) and bake for about 40 minutes.
5. Remove from the oven and let them cool for about 10 minutes. 
6. Once they're cool, just hold the heads cut side down and squeeze. The cloves will fall right out. The heat from whatever you're cooking will bring out the flavors of the garlic even more!!!
7. Try with pasta, potatoes, chicken, etc...
***the lower the temperature and the longer you cook it, the better it will taste. If you have extra time, try 275* for an hour!!!***