Search

Wednesday, May 30, 2012

Buttercream Frosting


I can't remember if I have already told you all what I do (besides this blog!). I am a preschool teacher, which means I need to amp up my creativity and funness! This week is dinosaur week. Now, for a girl who loves to bake what is more perfect?! Dinosaur cookies!!! Of course I had to have three different colors of buttercream frosting. But I quickly realized that there was NO way I would serve these kids the frosting from the grocery store isles that aren't even refrigerated. So I whipped up a batch of my homemade buttercream frosting. It is very light and fluffy and simply delicious! The recipes does call for heavy cream which you can substitute for nondairy creamer but its frosting. It won't be good for you regardless. So just go for it!!! Use this recipe for icing cookies, cupcakes, cakes, anything you want! Your tummies will be very pleased :) As you can see, we made dinosaur cookies, so that is what you'll get to see!

What you'll need (and this makes a good amount!):
3 cups powdered sugar
1 cup butter, at room temperature
2 tbs. heavy cream
1 tsp. vanilla extract

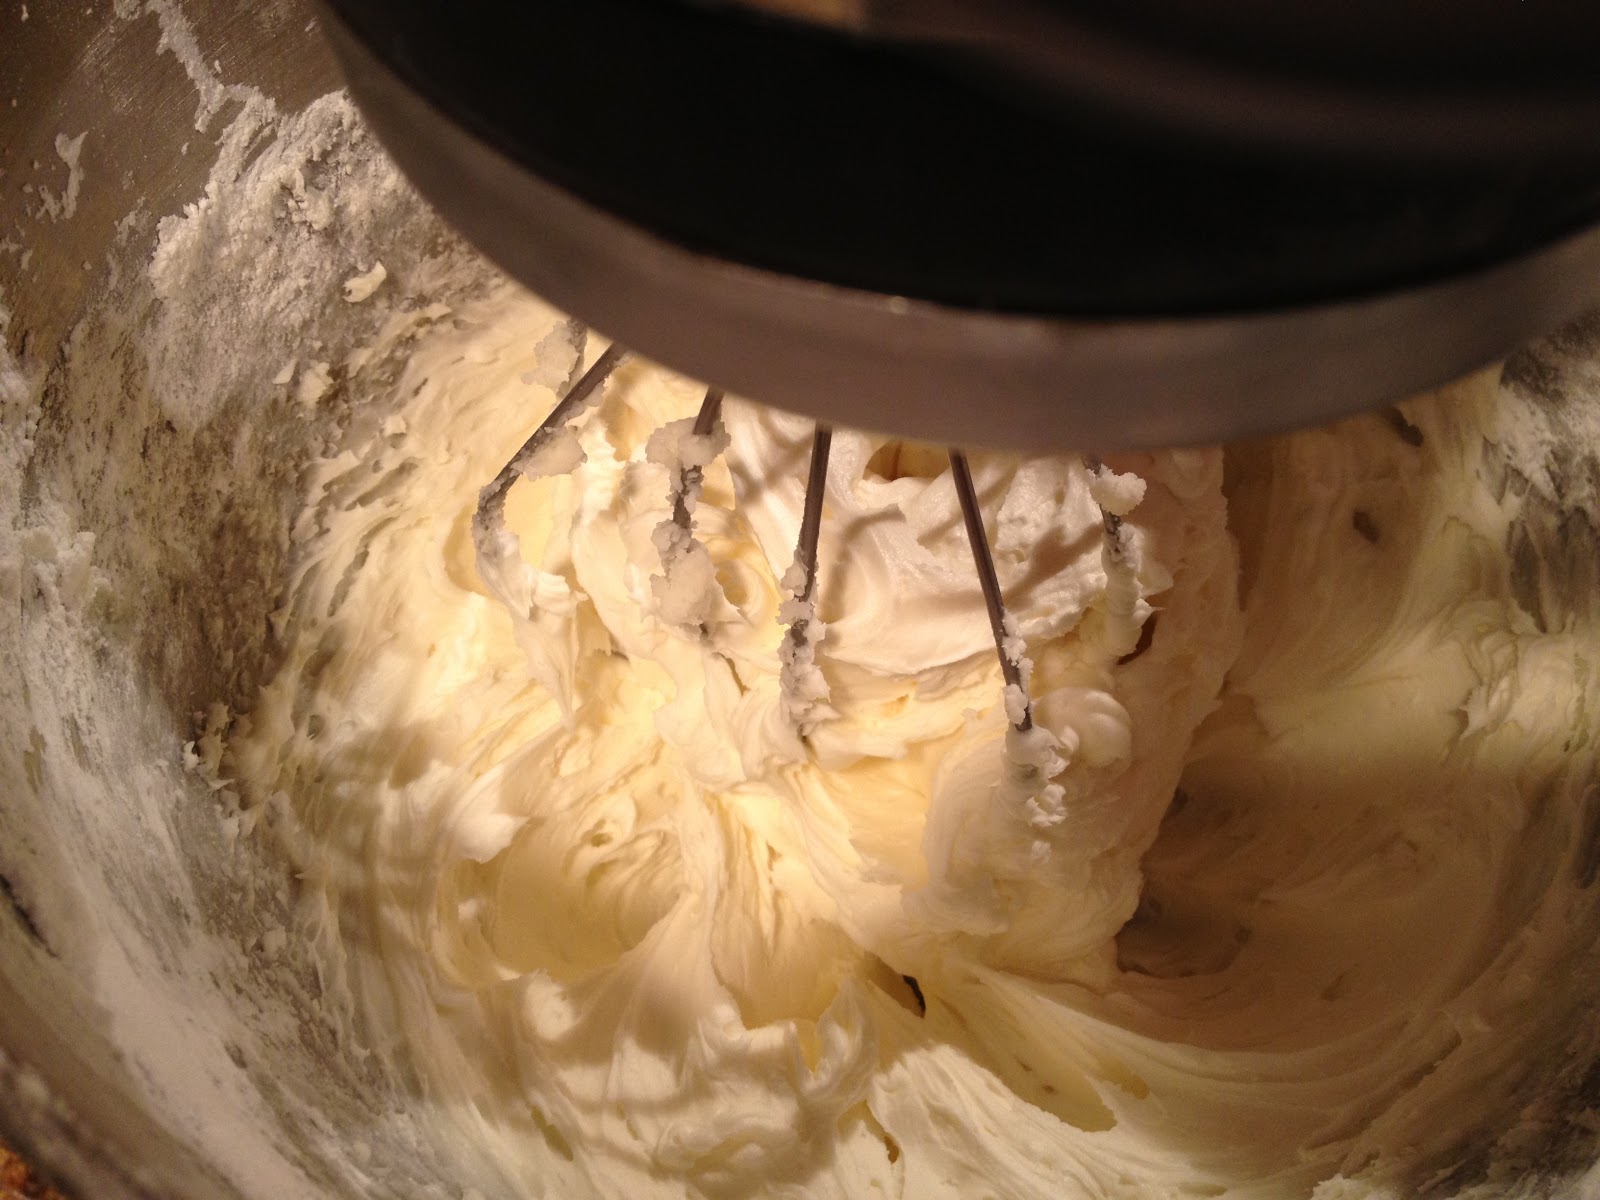
1. In a standing mixer with a whisk paddle, blend together the butter and powdered sugar, one cup at a time (of the sugar. Or else, you will wear the sugar... like I did...). Mix on low speed for about 1 minute.
2. Once the sugar and butter are starting to come together, mix on medium-high for about 2-3 minutes.
3. Add the heavy cream and vanilla. Taste (the best part!!!) and see if it needs more powdered sugar (it might).

4. Leave at room temperature and decorate away!

enjoy :)

Tuesday, May 29, 2012

Potato Salad


 This weekend officially marked the beginning of summer celebrations and BBQs. Of course, this means some delicious meat deal, and potato salad and cole slaw, of course! I have made cole slaw and potato salad before but it has always had a generic taste. And I REALLY do not enjoy the store-bought kind. As you know, I was home alone this weekend which left me with plenty of time to test out some recipes on myself. I actually made the cole slaw and potato salad the night before, just in case they didn't taste too great. That way, I wouldn't be rushing to make something. If they turned out yummy, then the flavors would only get better overnight. Anyways, this potato salad was DECLICIOUS. It has dijon mustard in it, which you could of course leave out, so the kids might not love it. I wanted to be festive so I used red, gold, an blue potatoes. You may use any kind you like. But, no matter what, it will taste delicious! You may definitely skip the step that has the potatoes steaming in the pot. This was the first time I tried it, and it really does work, just be patient! Patience, and fabulous ingredients, with this meal will equal happy tummies. :)

What you'll need:
3 lbs. baby potatoes (any color/type will do, as long as they're small)
3/4 cup mayo
1/4 cup fat free sour cream
2 tbs. fresh lemon juice
2 tbs. dijon mustard
1/2 cup chopped red onion
1 tbs. pepper
1 tbs. kosher salt (or more, to taste)

1. Rinse your potatoes. Fill a large pot with cold water. Add potatoes to the pot and boil on high. (YOU ALWAYS COOK POTATOES IN COLD WATER!!! DON'T ASK WHY, THIS IS JUST THE RULE!!!)

2. While the potatoes are cooking, mix together in a bowl the sour cream and lemon juice (This is a substitute for buttermilk. You may use buttermilk but I did not want to after the plethora of desserts I had lined up for this mean).
3.  Chop the red onions into small pieces (nobody wants to bite into a big chunk of onion!). In the bowl with the sour cream and lemon, add the mayo, mustard, red onions, salt, and pepper. Whisk together.

4. Once the potatoes are just about fork tender, drain them, leave in a colander over the pot and cover with a dry kitchen towel. Let them steam for about 20 minutes.

5. Once the potatoes are cool, cut them in half (or quarters depending on the size).

6. In a large bowl, mix together the mayo mixture and the potatoes. Cover with plastic wrap, let sit in fridge overnight (you don't HAVE to do this, but the flavors only get better overnight!).

7. Serve in a WHITE bowl or platter and garnish with a tiny but of cayenne pepper.

enjoy :)

Monday, May 28, 2012

Chocolate Dipped Strawberries

After I finished making the rainbow fruit skewers, I had lots of leftover strawberries. I could have made a fruit salad or baked a strawberry something or other, but I felt like being fancy (that and I had a ton of time and nothing to do. Who would complain about that?! I guess I do...). Of course that means chocolate! And what is more decadent and special than chocolate covered strawberries? I also had some BBQ skewers leftover so I used them to help dip the strawberries. WOW... What a difference! I have dipped other things in chocolate and it has made such a nasty mess. These keep them clean and let the excess chocolate drip off so they're lightly, yet perfectly, coated. Now this is my first attempt at making them all by myself so please forgive me if the photos and the appearance isn't fabulous. But as long as it tastes good, that's all that matters, right? Dip in chocolate and drizzle with white chocolate for a lovely and special dessert treat!

What you'll need:
1 container large strawberries
1/2 cup white chocolate chips
1 cup semisweet chocolate chips
3 tbs. heavy cream, plus an extra 1 1/2 tbs.
Cookie sheet lined with parchment paper

1. Wash your strawberries and let dry completely. Separate your semisweet chocolate chips from your white chocolate chips in two glass bowls.
2. In a small pot, simmer about 1 inch of water (this will create a double boiler to melt the chocolate without burning it).

3. In one heatproof bowl, melt the semisweet chocolate chips and the 3 tbs. heavy cream, constantly stirring with a wood spoon. It is VERY important that the water in the pot does NOT touch the bottom of the bowl. If it does, THE CHOCOLATE WILL BURN!!! (if the chocolate seems to thick, add a little more heavy cream)
 

4. Once melted, remove from heat. Dip the strawberries in and place on the parchment paper to let cool.
 

5. While the strawberries are cooling, melt the white chocolate over a double boiler with 1 1/2 tbs. heavy cream (again, if the chocolate seems to thick, add a little more heavy cream).

6. After the white chocolate has melted, take a small spoon, and drizzle over the strawberries (it's fine if they're not perfect, it'll look better if it's not perfect!).

7. Refrigerate for a few hours, place on a pretty, WHITE, platter and serve!!!
enjoy :)

Rainbow Fruit Skewers


With all of this free time this weekend, I decided to cook for a small army. I made potato salad, two cole slaws (one vegan for Mama), chocolate chip cookie mousse cake, and brisket sliders. We had so much beautiful fruit in the house I figured I'd use it somehow. What's better than food on a stick!? Fruit skewers! There really isn't much to this recipe. It's an amazingly fun dish to serve with dinner, lunch, or drizzle some chocolate and whipped cream over it for dessert (OoOoO I think I just might do that tonight!). AND, serve these on a white platter! As I told you in Tips in the Kitchen: WHITE, everything looks better serve on white. The colors of the fruit will POP like no tomorrow and there won't be any left!!! Don't forget your rainbow order: Roy G. Biv!!!

You can use whatever fruits you want but I used (this made enough for about 20 skewers. assume everyone will have 3):
1 cup strawberries
1 cup cantaloupe
1 cup pineapple
1/2 cup green grapes
1/4 cup blueberries
1/2 cup red grapes

1. WASH YOUR FRUIT!!!
2. Cut the cantaloupe and pineapple into bite size pieces (not TOO small, about the size of a quarter, maybe a tiny bit bigger).
3. Slice the tops off of the strawberries (if they're too big, slice them in half or quarters, as long as they're about the same size of the cantaloupe and pineapple).
3. Assemble your skewers! Remember, rainbow order!

enjoy :)

Sunday, May 27, 2012

Creamy Tomato Basil Penne with Shrimp

Oh my gosh. Welp, guys, I think I've outdone myself... again. This weekend I was home alone babysitting the doggies for Mommy and El. With all of this alone time, I was given plenty of time to plan out a DELICIOUS meal for Daniel (he was out of town Friday night). I don't even know how do describe this meal. Penne pasta with shrimp in a tomato basil cream sauce. Wow. It was rich, it was light, it was everything you want in a pasta dish. I know what you're thinking... this is pretty unhealthy. I won't lie, it is. But it is so decadent and so delicious that it's a perfect meal for a celebration or special occasion. (And, it's great the next night!!!) Oh, and what made it even better, you ask? BACON!!! Yup, shrimp, basil, cream, and BACON!!! 
The next time you really want to impress a guest (or a group), this dish is super easy yet tastes (and smells!!!) like it's fresh from an Italian restaurant.

What you'll need (this will feed AT LEAST 4 people):
1 lb. uncooked shrimp (peeled and deveined!)
4 cloves garlic
1/4 cup white wine
3/4 cup chopped fresh basil
3/4 cup heavy cream
1 can diced tomatoes (juices included)
4 slices bacon
1 cup FRESHLY grated parmesan cheese
1/2 tsp. red pepper flakes
1 1/2 tsp. kosher salt
1 tsp. pepper

1. Boil a large pot of water (once boiling, add a handful of kosher salt to the pot. This will flavor the water which is our only real chance of flavoring the pasta itself).
2. While the water is boiling chop the garlic and basil.
3. In a large nonstick pan, cook the bacon over medium heat. Once cooked, move to a plate lined with paper towels to drain. DO NOT DRAIN THE BACON FAT!!!
4. In the SAME pan WITH THE BACON FAT, sauté the garlic for about 30 seconds (any longer and the garlic will burn!). 
5. After 30 seconds or so, add the white wine to the pan and scrape the bottom of the pan and get all of those good, flavorfilled bacon bits (this is called deglazing. It brings up all of the flavors stuck at the bottom of the pan).
6. Add the can of diced tomatoes and red pepper flakes to the pan.
7. To the pan, add the heavy cream, salt, pepper and basil. Let cook on low until thickened (about 10 minutes). LET THE SAUCE THICKEN WHILE THE PASTA IS COOKING. IF YOU TIME IT RIGHT, THEY'LL BOTH BE READY AT THE SAME TIME!!!
8. Once the sauce is thickened and the pasta is just about ready, add the uncooked shrimp to the pan (they'll cook quickly! 4 minutes TOPS!).
9. Using a fine grater (a zester works great), grate the parmesan (spend the extra few dollars and get the authentic kind, like I used. It's worth it).
11. Drain the pasta and add to the pan (reserve some pasta water to thin out the sauce if it's too thick). Toss in the parmesan and bacon and transfer a large serving bowl. 
 
12. Garnish with a little more basil and parmesan.
enjoy :)

Oh, and like I said in my previous Tips in the Kitchen: WHITE entry, serve everything in white bowls, simple wine glasses and water glasses, and white napkins. 

Saturday, May 26, 2012

Tips in the Kitchen: WHITE

So I've been reading some of my old posts and feel a bit bad. I feel as though I've bombarded some of you with some techniques, tools, and appliances that i INSIST on you all buying. That was not my intention. I created this blog simply because I love food, I love to cook, and I want to share that with everyone. Some of us are not classically trained, not professional chefs, and some just can't even make toast. So I decide to create this new segment of my blog that I will feature once a week. Here, I will provide you with some simple entertaining techniques, products I love, quick culinary tips, and anything else that pops into my head while I'm laying in bed.
Seeing as how it is Memorial Day this week, the theme is WHITE. We are allowed to wear our white pants, shoes, break out the pool toys, and summer is officially starting! Over the past few years, I have become more and more interested in how my food looks, and not just how it tastes. As any caterer will tell you, simplicity is best. This is why I love to use WHITE. White bowl, platters, plates, and a very simple drinking glass (I HATE anything with ridges, prints, curves, etc...). By keeping your serving pieces simple, it allows the food to stand out and the colors pop (and maybe taste a little better? Nah, probably not, but who cares! They'll look great!)!!!
pasta looks GORGEOUS in these bowl from C&B

Make sure you buy enough pieces, usually 6 or 8, as that is what a "set" will consist of. You NEVER want to have one or two people over that have a different looking plate, that'd be tragic!!! I know what you're thinking, we're on budgets, we don't know where to go, what size? Again, the key word here is SIMPLE. Crate & Barrel has some great deals on ceramic white platters and bowl sets, and Target just introduced their "Whiteware" Collection in the home department. Start with one item. Maybe this month is bowls, next month can be platters, and then wine glasses after that. I prefer rectangular, sleek pieces rather than those with funky edges, prints, or funny shapes.
I served the "Balsamic Bruschetta" on this platter, also from C&B
Here is Crate & Barrel's selection of fabulous pieces at even more fabulous price, and here is Target's selection of "Whiteware."Start small, pick one are of serving to focus on, build on it, and from there progress (little by little so your wallet doesn't have a heart attack) until your kitchen is complete. By using White, your meals look incredibly chic as though they're from a restaurant and totally beautiful :).

Friday, May 25, 2012

Caprese Pizza


I think it comes as no surprise to you all how much I love cheese. String, shredded, or in a block, I love it. Needless to say, when I was in charge of dinner the other night, and picked the oh-so-predictable theme of Italian, I had to make pizza. But ever since we have purchased a pizza stone, it has made the pizza taste so much better. The cheese cooks perfectly and gets a beautiful crunch on it. The trick with the stone is that you preheat the stone in the oven so it cooks the pizza (or bread or whatever) from both the top and bottom. If you're bored with your meals, invest in a pizza stone (or go to your hardware store and purchase a plank of unglazed quarry tile such as terra cotta and turn your oven into a fancy Italian pizza oven!). Anyways, cheese. Yes, cheese. MmMmM gosh I just love it. And I was in a particularly good mood so I make half of the pizza vegan and half normal. I know it's usually called a margherita pizza, but I called mine caprese because i did NOT use garlic. After the bruschetta i made, I didn't want to anger anyone with more garlic. If you're looking for a light yet very satisfying meal, go with a great caprese pizza and PLEASE invest in a pizza stone!


What you'll need:
1 whole wheat pizza dough
3 roma tomatoes
Whole log part skim mozzarella log
Organic tomato basil marinara
1/4 cup basil leaves (FRESH!!!)
1/2 cup flour
1/4 cup olive oil


1. Place your dough in a bowl with the olive oil, cover with a damp cloth, and set aside for about an hour (the dough will rise and cook more evenly).
2. Slice your basil, tomatoes, and mozzarella.
the rectangular cheese is the vegan mozzarella
3. Once dough has set, flour a large area to roll out the dough until it just about fits on your stone (or cookie sheet).

4. Follow directions for your pizza stone (if not using one, just follow the directions on your dough). 
5. Place the dough on the stone and begin with a VERY THIN layer of sauce (you don't want to bit into a huge chunk of sauce, it's not pasta!), then evenly spread out the tomatoes and cheese.

6. Finally, sprinkle the julienned basil all over and bake!
half vegan (on right) and normal (on left)
ok, maybe sprinkle some parmesan, too :)
7. Once cooked, let sit for a few minutes (or else the cheese will become a mess!) before serving.

enjoy :)